Home-made Gorgonzola cheese: Difference between revisions
No edit summary |
No edit summary |
||
| Line 22: | Line 22: | ||
|PrepTime = 2 days | |PrepTime = 2 days | ||
|CookTime = 25 minutes | |CookTime = 25 minutes | ||
|Image = [[Image:Home-made Gorgonzola cheese recipe.jpg | |Image = [[Image:Home-made Gorgonzola cheese recipe.jpg|alt=Electus]] | ||
}} | }} | ||
</div> | </div> | ||
| Line 39: | Line 39: | ||
| A little [[DVI starter]] (see picture) | | A little [[DVI starter]] (see picture) | ||
| Freeze dried [[Penicillium Roqueforti]] (see picture) | | Freeze dried [[Penicillium Roqueforti]] (see picture) | ||
| | | 1 ml [[Rennet|rennet]] | ||
| [[Sea Salt|sea salt]]. Use absolutely no more than 2% salt to total weight of cheese. | | [[Sea Salt|sea salt]]. Use absolutely no more than 2% salt to total weight of cheese. | ||
| Line 51: | Line 51: | ||
** Cover and [[Refrigerate|refrigerate]] for up to 24 hours - use within 3 days | ** Cover and [[Refrigerate|refrigerate]] for up to 24 hours - use within 3 days | ||
*[[Sterilise]] all equipment | *[[Sterilise]] all equipment | ||
<gallery widths= | <gallery widths=250px perrow=5> | ||
Image:Stichelton.jpg|View the hi-res. original to see the 'vein' piercings | Image:Stichelton.jpg|View the hi-res. original to see the 'vein' piercings | ||
Image:Curd draining - two colanders.jpg|Draining the curds | Image:Curd draining - two colanders.jpg|Draining the curds | ||
| Line 80: | Line 80: | ||
===Chef's notes=== | ===Chef's notes=== | ||
Don't worry about how much 'extra' water that you are adding through the various stages because as soon as the cheese separates, it will just become part of the [[whey]] which is then of course discarded anyway. | Don't worry about how much 'extra' water that you are adding through the various stages because as soon as the cheese separates, it will just become part of the [[whey]] which is then of course discarded anyway. | ||
Following a nice email from Bindu, it seems I had left some ambiguity regarding the amount of rennet used. I've not measured rennet so accurately on most cheeses I've made since. I usually add a few drops and leave it to set. If it did not set, I would add a few more and try it again. You can always add, you cannot take it away again afterwards. | |||
<span class="review"> | <span class="review"> | ||
<span class="reviewHeader"> | <span class="reviewHeader"> | ||
=== | ====Random recipe review==== | ||
</span> | </span> | ||
''<span class="reviewTitle">Brilliant</span>'' | |||
<span style="line-height:180%"><span style="font-size:180%;"><span class="reviewScore">5</span>/5 </span> | |||
<span class="reviewDesc">Super tasty blue cheese at home. Who would have guessed this was possible!</span> | |||
<span class="reviewAuthor"> [[User:PSmith|Paul R Smith]] </span></span> | |||
{{RecipeLine}} | {{RecipeLine}} | ||
[[Category:Recipes]] | [[Category:Recipes]] | ||
Revision as of 11:34, 27 November 2020
This recipe needs advance preparation!
| Home-made Gorgonzola cheese | |
|---|---|
 |
| Servings: | Servings: 40 - Makes 1 kg of Gorgonzola |
| Calories per serving: | 329 |
| Ready in: | 2 days, 25 minutes plus maturation period |
| Prep. time: | 2 days |
| Cook time: | 25 minutes |
| Difficulty: | |
| Recipe author: | Chef |
| First published: | 20th January 2013 |
Prepare 24 hours in advance!
Remember, you need to prepare the freeze dried Penicillium Roqueforti 24 hours in advance of making the cheese. I always forget. Maybe this note will help next time.
I dare not call myself an expert as I have only made one blue cheese before this attempt; however, I know what I like!
The beauty of making your own cheese is that you can get it exactly to your liking. Add extra cream and don't press the cheese too hard and you will obtain a wonderfully gooey blue cheese, akin to Saint Agur Blue cheese. I also found that with a gooey-runny blue cheese, you need more than one piercing session to assist the veining as the holes tend to 'heal-up', with it being so soft.
Follow-up notes: This has turned out to be a nice cheese. Not overly soft, but it has a very smooth creamy texture with a softer flavour than my Home-made Stilton-type cheese
Ingredients
Printable 🖨 shopping 🛒 list & 👩🍳 method for this recipe
- 4 litres full cream milk
- 1.2 litre double cream
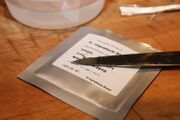
- A little DVI starter (see picture)
- Freeze dried Penicillium Roqueforti (see picture)
- 1 ml rennet
- sea salt. Use absolutely no more than 2% salt to total weight of cheese.
Mise en place
- Prepare the Penicillium Roqueforti mould culture
- Boil a little water and allow to go cold.
- Pour 150 ml of the cold, sterilised water into a lidded container.
- Whisk up a small amount of freeze dried Penicillium Roqueforti (see picture) into the cold, boiled water so the powder is held in suspension.
- Cover and refrigerate for up to 24 hours - use within 3 days
- Sterilise all equipment
-
View the hi-res. original to see the 'vein' piercings
-
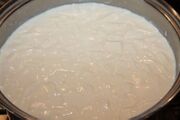
Draining the curds
-
Immediately after cutting the curds
-
P.R. Knife-tip, used to treat 6 litres of milk (would probably do much more)
-
DVI - Knife-tip, used to treat 5 to 6 litres of milk (would probably do much more)
Method
Setting the curds
- Using a double boiler pre-warmed to 30° C, add the cold pasteurised milk and slowly bring the milk temperature to 30°
- Whisk the DVI starter into a little of the warm milk and re-introduce the milk suspension to the boiler.
- Pour the Penicillium Roqueforti mould culture into the warm milk. Whisk to mix. Cover with a clean tea-towel and leave for 30 minutes.
- Add 1ml of rennet to 1 tablespoon of cold, previously boiled water, mix well and add to the milk.
- Whisk to mix, cover and leave in a warm place (about 22° C) until the curd sets - this may take 2 to 3 hours.
- Cut the curds into 2.5 cm cubes and leave for 30 minutes. Ideally a grid-shaped cutter should be used for this but I have found a long bread knife does this quite well. Cut in a cross-hatch pattern from the top and then diagonally sideways to cut the 'cubes.
- After 30 minutes, drain as much whey as you can. Because this is so creamy, it is not as easy as thinner curds so most of the draining has to be done in cheesecloth-lined colander.
- Ladle all of the cut curds into a cheesecloth lined colander to drain. Leave until they have reduced by 50%. This may take up to 4 hours.
- Pack the curds into one cheesecloth lined mould and allow to drain for 2 to 4 days at about 24°, turning often, preferably somewhere with a very high humidity (90%). A Chinese steamer makes a very good cheese mould, though it does need lining first.
- I originally used the weight of a bottle of wine to 'press' the cheese, but now I just keep turning the cheese. Its own weight seems to do the trick, though it may take a bit longer.
- Once the cheese has firmed up a little, remove from the cheesecloth and rub the surfaces with salt.
- Regularly turn and salt the cheese for another 3 days, a total of 5 to 7 days from the start of draining.
- Use a sterilised skewer to pierce the cheese to allow the mould to form. (See picture)
- Leave to mature for as long as you can bear! A wooden steamer or a wicker plate is good for this as it won't make the cheese sweat. The ideal conditions are around 10° C at 90% humidity. Turn daily if you can remember.
- Unless you have a cave handy, the fridge is probably the best place to mature your homemade cheese although it's really going to be too cold. After discovering the top shelf of my often-opened fridge could be as much as 5° C warmer than the bottom, I've decided to mature my cheeses there. As all fridges differ, check various areas of your fridge with a thermometer to find the area that is around 11°C [51° F], the ideal 'cave' temperature.
Chef's notes
Don't worry about how much 'extra' water that you are adding through the various stages because as soon as the cheese separates, it will just become part of the whey which is then of course discarded anyway.
Following a nice email from Bindu, it seems I had left some ambiguity regarding the amount of rennet used. I've not measured rennet so accurately on most cheeses I've made since. I usually add a few drops and leave it to set. If it did not set, I would add a few more and try it again. You can always add, you cannot take it away again afterwards.
Random recipe review
Brilliant
5/5
Super tasty blue cheese at home. Who would have guessed this was possible!
Discover Cookipedia's Culinary Creations on Pinterest
Explore the vibrant world of Cookipedia through our Pinterest page! We've curated a stunning collection of recipes that highlight the beauty of home-cooked dishes. It's the perfect way to visually navigate our extensive recipe library and get inspired by the flavours we’ve shared over the years. Dive in and discover your next favorite meal—one picture at a time!
#penicilliumroqueforti #curds #homemadegorgonzolacheese #whey #cream #cheesecloth #cheese #dvistarter #doublecream #boil #pasteurised


