Home-made Camembert cheese
This recipe requires preparation in advance!
Prepare 24 hours in advance!
Remember, you need to prepare the freeze dried Penicillium Roquefortii 24 hours in advance of making the cheese. I always forget.
Well, Cottage, Cheddar, Caerphilly and Stilton worked out very well so now it's time to try making Camembert cheese at home. As with the last few that I've made, I am using full-fat milk and adding double cream for that rich, creamy, high-cholesterol effect!
| Home-made Camembert cheese | |
|---|---|
 |
| Vegetable steamer as mould - centre removed | |
| Servings: | Servings: 16 - Makes 600 g of finished cheese |
| Calories per serving: | 210 |
| Ready in: | 1 day |
| Prep. time: | 1 day plus maturation period |
| Cook time: | None |
| Difficulty: | |
| Recipe author: | Chef |
| First published: | 14th October 2012 |
|
Best recipe reviewHard work! 5/5 A lot of work involved, just to make your own cheese, but well worth the effort. |
Ingredients
Printable 🖨 shopping 🛒 list & 👩🍳 method for this recipe
- 4 litres full fat milk
- 300 ml double cream
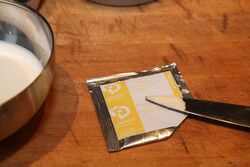
- 5 ml liquid starter or a little freeze-dried DVI starter (as much as will go on the tip of a pointed knife - see picture)
- 3 drops of rennet
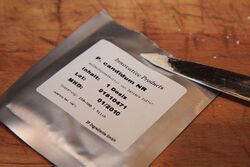
- A little freeze-dried Penicillium culture (as much as will go on the tip of a pointed knife - see picture)
Mise en place
- Sterilise all equipment
- Add 3 drops of rennet to 1 tablespoon of cold, previously boiled water, mix well.
-
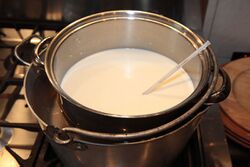
Use a double boiler so you don't scald the milk
-
DVI - Knife-tips worth
-
Penicillum candidum - Knife-tips worth
Method
- If using unpasteurised milk, pasteurise and allow to cool, add the double cream and stabilise at 29° C
- If using shop-bought milk, add the double cream and adjust the temperature to 29° C.
- Add the freeze dried DVI and the Penicillium culture by sprinkling on the surface of the milk and whisking well.
- After 30 minutes check the temperature is still 29° C, add the diluted rennet, cover and leave until the curd has set, ensuring the temperature remains constant. I find covering with a few towels helps keep retain the temperature.
- Once the curd has set, don't cut the curds with a knife, but ladle, in large slices directly into the mould.
- Leave to drain at 20°. When the curds are firm, turn upside-down and continue draining. This entire process may take a day or so.
- When the curds are firm enough to remove from the mould, rub with a fine dusting of salt.
- Transfer to a drying area (18° C / 80% humidity) for 2 days.
- Then move to a ripening area (around 12° C / 80% humidity) for about 10 days or more, by which time the mould should have formed.
- Unless you have a cave handy, the fridge is probably the best place to mature your homemade cheese although it's really going to be too cold. After discovering the top shelf of my often-opened fridge could be as much as 5° C warmer than the bottom, I've decided to mature my cheeses there. As all fridges differ, check various areas of your fridge with a thermometer to find the area that is around 11°C [51° F], the ideal 'cave' temperature.
Chef's notes
When trying to stabilise the temperature, take your time and don't rush or you will almost certainly overheat the milk and spoil your cheese.
It's quite useful, once you think you have stabilised the milk at a certain temperature, to leave if for 30 minutes and then check the temperature again before starting your cheese making.
Dusting with salt: I find that I use less salt but get a more even covering if I dust with salt that has been ground to a very fine powder in a coffee grinder first.
Discover Cookipedia's Culinary Creations on Pinterest
Explore the vibrant world of Cookipedia through our Pinterest page! We've curated a stunning collection of recipes that highlight the beauty of home-cooked dishes. It's the perfect way to visually navigate our extensive recipe library and get inspired by the flavours we’ve shared over the years. Dive in and discover your next favorite meal—one picture at a time!
#doublecream #dried #freeze #mould #fat #cheese #homemadecamembertcheese #curd #curds #frenchrecipescamembertcheese #cutthecurds


